!! Version 1.2
With Version 1.1 the presliced sprites were provided, with Version 1.2 i added a real cool way to use the MSCA… here is the tutorial:
1. Install the package, you should open the sample scene provided
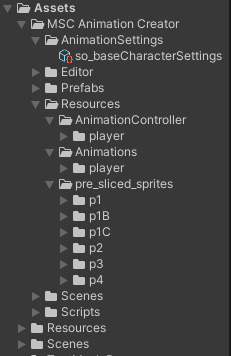
2. Enlarge the folder structure of the MCS Animation Creator
Inside the Resources folder you’ll find the „pre_sliced_sprites“ Folder. Select it and Press Ctrl+d to duplicate it (so you will still have the original ones, just in case)
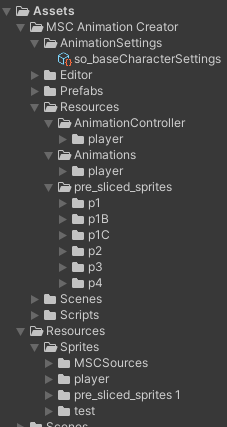
3. If you don’t already have a „Resources“ Folder inside you’re Assets, create one and if you want a subfolder too, and drag the duplicated „pre_sliced_sprites 1“ into it.
Add the Original Sources of the Mana Seed Character Base. Now you have to select all of the textures provided in the original Sprites and check if the „Read/Write“ Enable in the Advanced settings of the textures is enabled
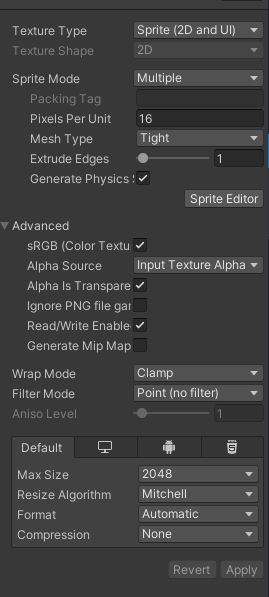
All of the Textures need to have this enabled
4. Open the MSC Animator Window
This should show you this:
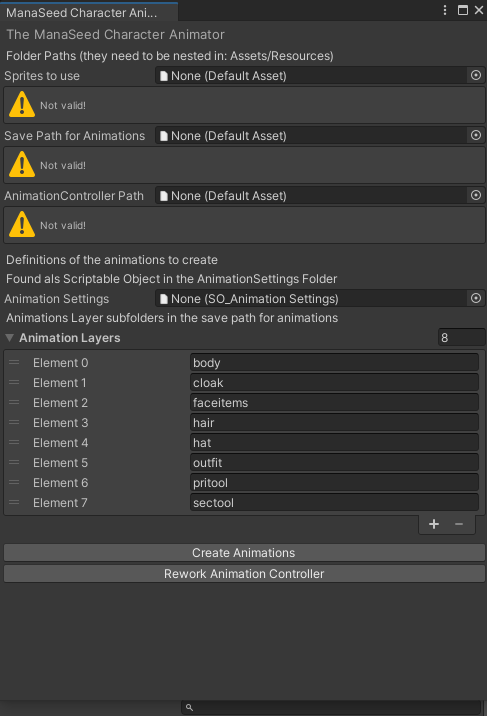
6. Populate the fields of the Animator
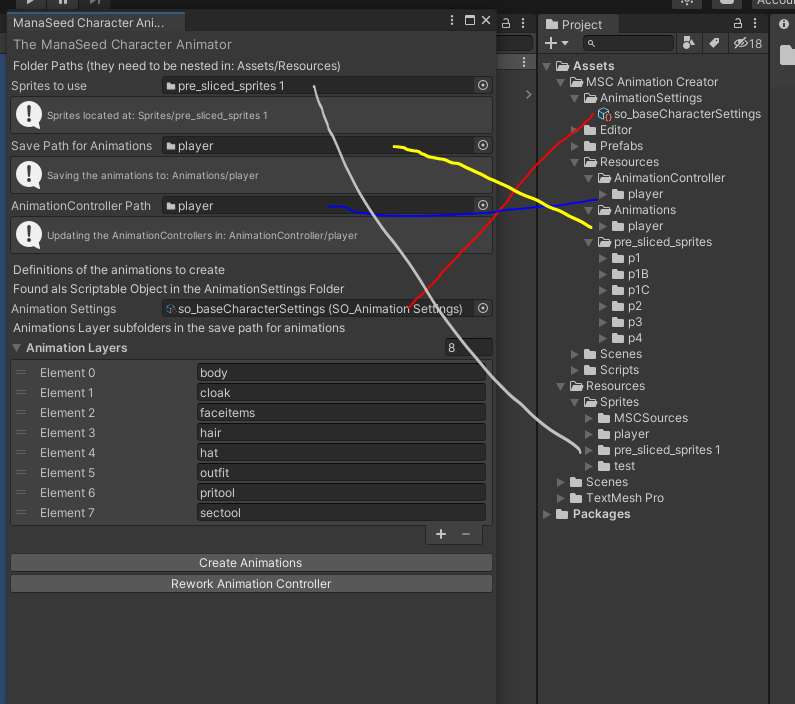
For the sprites use the duplicated on inside your Resources Folder, you can use the animations and animationsController in their original position or duplicate them too… and you’ll need the animation settings
First press the „Create Animations“ Button, wait till finished, then press the „Rework Animation Controller“ Button
7. Repopulate the Animator Controller in the Player-Object in the SampleScene. You should use the Animation Controller in the Folder you draged into the Animator Window in Step 6
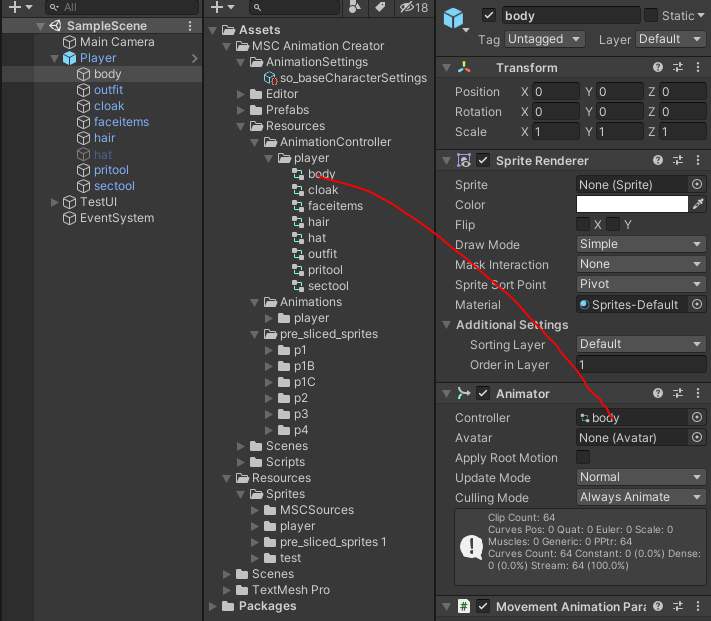
You’ll need to do this for all the Layer Parts of the Player object
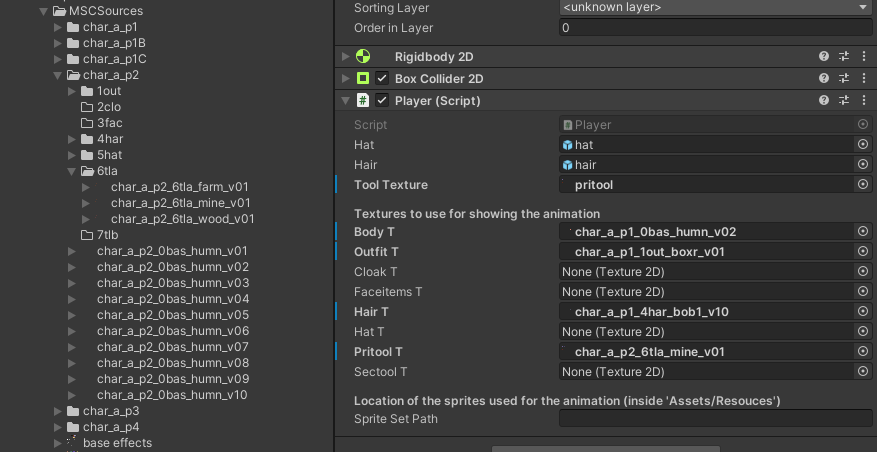
8. Go to the folder of the Sprites used in step 6 and set the Tool Texture in the Player Base-Object to the „pritool“ in the P2 page. This is for swapping the primary tool in the scene.
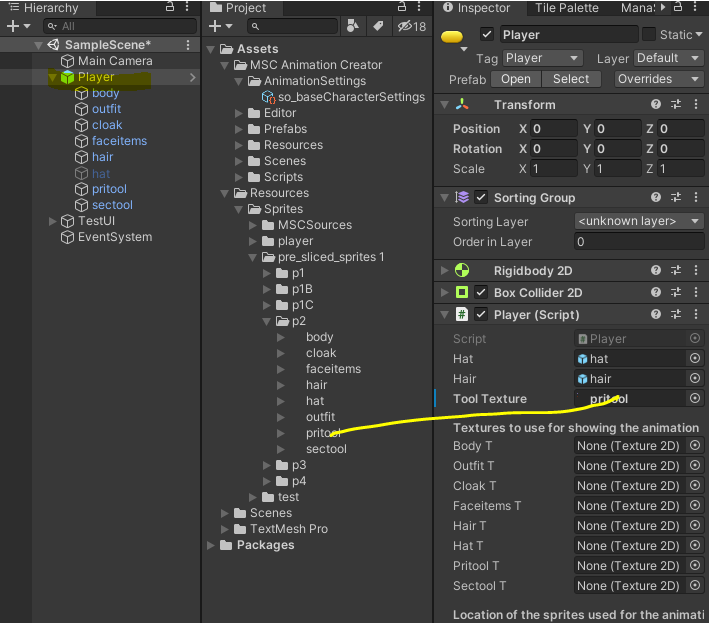
9. You can set the Texture-Files the System should use in the Player Main Object. Just select one for each layer. Drag and Drop it in the corresponding field.
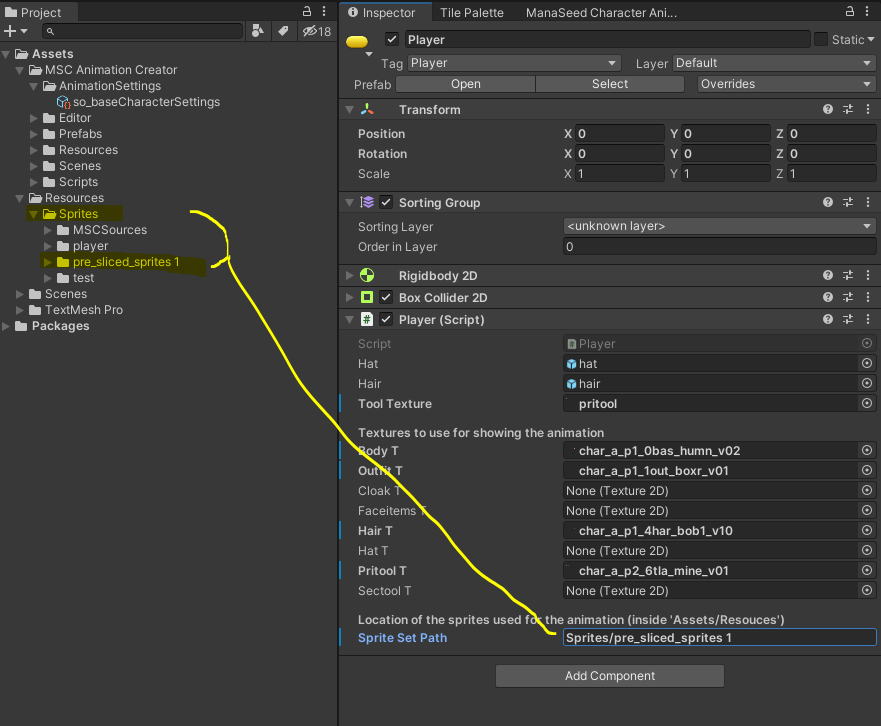
10. The last thing you need to do is tell the System where your used sprites are located. Type into it the path AFTER the Resources folder.
For my example it was: „Sprites/pre_sliced_sprites 1“ … if you didn’t use a subfolder it could be only „pre_sliced_sprites 1“ or any name you gave the folder the sprites you used for creating the animations are located in.
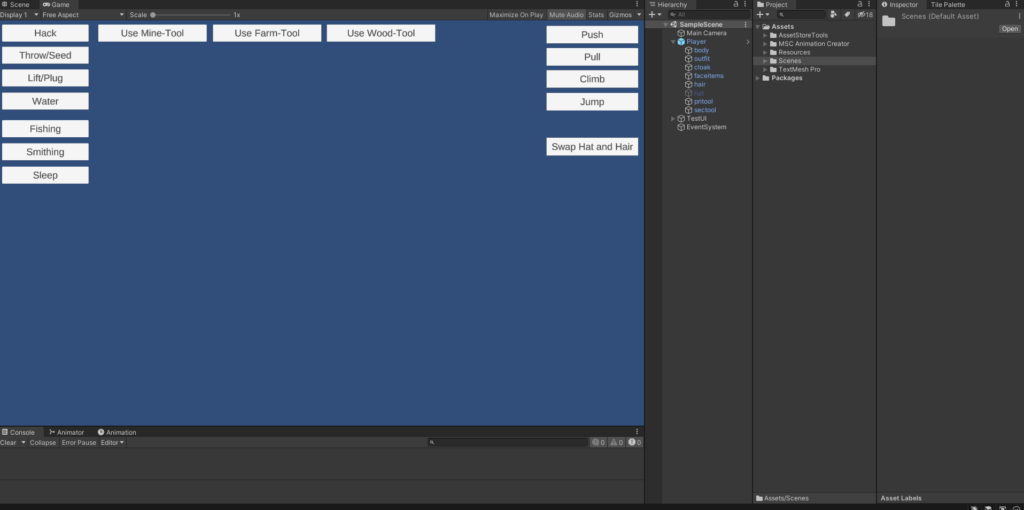
Run the SampleScene in the Unity Editor.
NOTE!!! The texture-replacement i used here in this setting is only working when you start this within the unity editor. For a standalone game to use the texture swapping you’ll need other methods.
I made two runs with different selected textures after following this steps: