With Version 2 I integrated the Combat animations of the Combat-AddOns provided by Seliel and tried to simplify the process of using the MSCA.
Additional to that I changed the provided Player-Class so it can be used outside the editor (in an actual build).
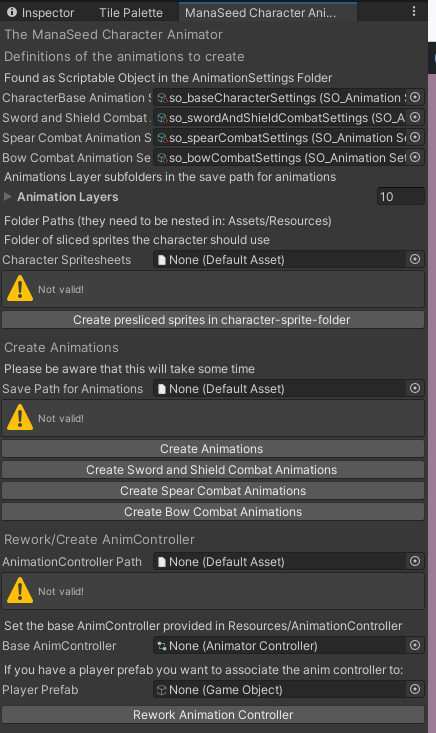
To activate the MSCA go to „Tools“ in the main menu and select the MSC Animator. It will open up the Editor Window for the MSCA
For those who used the older versions: I changed the order of the elements.
First of all you can set the Animation Definitions, provided with the Asset and found in „MSC Animation Create/AnimationSettings“, there are four ScriptableObjects now. If you don’t own the Combat Addons, just ignore the settings files for those and you only need the CharacterBase Animation Settings.
You can change the Scriptable Objects here when you want to tinker with the settings i provided.
There is one set of AnimationSettings for each animation:
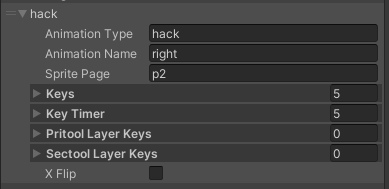
It contains the animation type, name, sprite Page as well as the keys (nr. of sprite on the page to be used), the key timer(timer set in animation for each key, needs to be the same length as keys), the primary tool layer keys (layer nr the sprite of the primary tool should be at the corresponding key, needs to be the same lengths as keys, and the secondary tool layers keys working like the settings for the primary tool
Notice: You don’t need the SpriteSheets from the ManaSeed Character Base or Combat Stuff at this stage, this only creates the basis for the animations, when you want to know why look at this explanation)
You need to create three folders for your character to store the files the MSCA will create.
Create the Folders and drop the one intended for the sprites in the „Character Spritesheets“, the one intended for the animations in „Save Path for Animations“ and the one intended to store the AnimController in „AnimationController Path“.
If you create the animations for the first time you need to click the button „Create presliced sprites in character-sprite-folder“. This will take some time but the editor will create all the needed spritesheeds, already sliced and with the right settings.
After that you can Press the „Create Animations“ and the following Buttons to create the Animations for your character. The Editor will create the folder-structure with the animation clips inside you proviced animations Folder. Please be aware that each of these steps will take some time
For the last step you need to drag the provided base AnimationController, that comes with the MSCA and is found under „MSC Animation Creator/Resources/AnimationController“ into the „Base AnimController“ field. Like with the AnimSetting-Files you can change the base animController to your liking, but check the explanation Page for the naming convention of the States so the MSCA will be working correctly when reworking the controller.
Last one to set is the Player Prefab. There is one provided by the MSCA found under „MSC Animation Creator/Prefabs“. You can use you own player prefab if you want to, but should use this when you want to test the anims with the SampleScene.
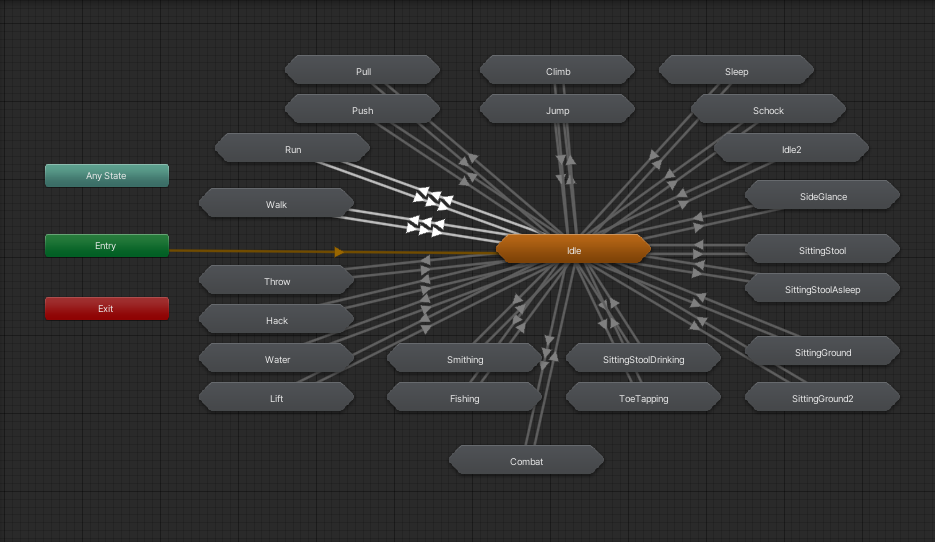
When everything is set, the anims are created you can press „Rework Animation Controller“ and the AnimationController needed for the Player Prefab will be set as well as set to the corresponding layers.
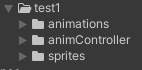
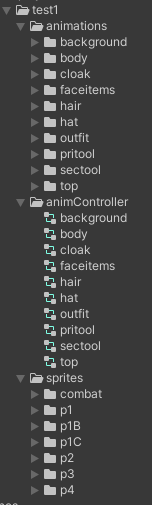 After that the folders should be filled like that.
To use the sampleScene you need to set some stuff on the Player Object in the scene but first you need to have the ManaSeed Sprites in a folder structure like this:
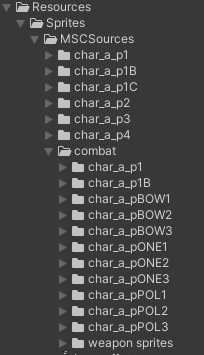 It needs to be below „Assets/Resouces“ and keeping the provided folders of the ManaSeed asset. Add the Combat Sprites as shown in a „combat“ subfolder.
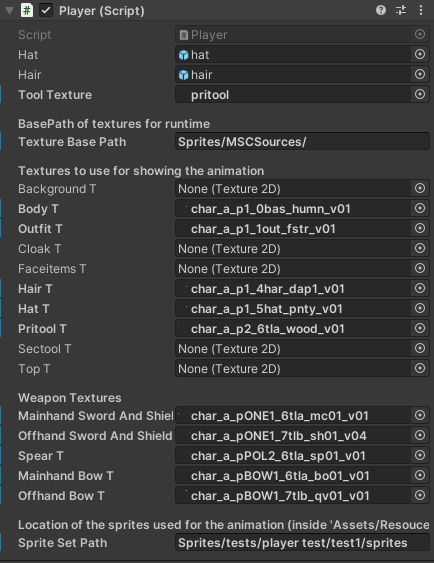 In the Player script attached to the Player Object in the SampleScene you need to set the textures to use for the testing.
The Textures for the Weapons go separatley in the „Weapons Textures“ part
Don’t miss the new field „Sprite Set Path“ where you need to type out the Path to the sprites you used in the MSCA for the „Character Spritesheets“. In the screenshot you can see the path i used for creating the examples.
After this you should be able to press play and test out the animations.
That’t all 🙂